Writing custom validator to validate multiple fields in JSF.
JSF supports conversion and validation to separate user interface tasks from business logic. There are several useful ready to use conversion and validation tags bundled with JSF. If the web application need special conversion and validation, JSF provide interfaces to implement you own conversion and validation or you can declare method in the managed bean as the following code.
@ManagedBean
public class MyMBean implements Serializable {
...
...
public void myValidator(FacesContext context, UIComponent uiComponent, Object obj) throws ValidatorException {
// your validation code
}
...
...
}
Assigning validator to input component in JSF pages.
<h:inputText id="fieldA" value="#{myMBean.fieldA}" validator="#{myMBean.myValidator}"/>
UIComponent and Object in custom validator declaration.
The Object parameter passed from JSF is a reference to input component which assigns this custom validator in its validator attribute (As example above, it refer to fieldA). The value of input component can be read by casting as String class.
String fieldAValue = (String)obj;
To find the value of other fields in the form, you can use UIComponent parameter to find target component and then get its value by using findComponent method as the following code.
UIInput fieldBInput = (UIInput) uiComponent.findComponent("fieldB");
String fieldBValue = (String) fieldBInput.getValue();
Example custom validator to verify changing password from user.
Requirements : Need a form to support user to change their password. User must enter the same password twice to confirm the new one.
Code for JSF form.
<h:form id="frmChangePassword">
<h:panelGrid columns="3">
<h:outputText value="New password" />
<h:inputSecret id="password1"
value="#{changePassword.password1}"
required="true"
requiredMessage="Please enter password"/>
<h:message for="password1" style="color:red"/>
<h:outputText value="Confirm password" />
<h:inputSecret id="password2"
value="#{changePassword.password2}"
required="true"
requiredMessage="Please enter password"
validator="#{changePassword.validatePassword}"
validatorMessage="Password mismatched!"/>
<h:message for="password2" style="color:red"/>
<h:commandButton value="Save"
action="#{changePassword.updatePassword}"/>
<h:commandButton value="Cancel" action="main-page" immediate="true"/>
</h:panelGrid>
</h:form>
Code for Managed bean.
@ManagedBean
@ViewScoped
public class ChangePassword implements Serializable {
private static final long serialVersionUID = 1L;
private String password1;
private String password2;
public String getPassword1() {
return password1;
}
public void setPassword1(String password1) {
this.password1 = password1;
}
public String getPassword2() {
return password2;
}
public void setPassword2(String password2) {
this.password2 = password2;
}
public void validatePassword(FacesContext context, UIComponent uiComponent, Object obj) throws ValidatorException {
UIInput uiPassword1 = (UIInput)uiComponent.findComponent("password1");
String password1 = (String)uiPassword1.getValue();
String password2 = (String)obj;
if (!password2.equals(password1)) {
throw new ValidatorException(new FacesMessage("password mismatch"));
}
public String updatePassword() {
String username = FacesContext.getCurrentInstance().getExternalContext().getUserPrincipal().getName();
System.out.println("Changing password for " + username);
if (password1.equals(password2)) {
// Do database related tasks;
return "main-page";
} else {
return "change-password-error";
}
}
}
Friday, July 19, 2013
Sunday, July 14, 2013
How to adjust the value of Seconds_Behind_Master in MySQL replication.
Seconds_Behind_Master variable in MySQL replicate is usually used to determine how long the replicated database lagging from its master. You can get this value by using SHOW SLAVE STATUS command or by using MySQL Workbench this value is shown in TIME column of the SQL THREAD process.

You can see that sometime this value is non zero even the replica has done all SQL statements replicated from master. As described in MySQL document, this value is not accurate due to the calculation of this value is related to speed of the network, time stamp in binary log and the system clock.
If MySQL replication has been setup in high speed network environment, you can adjust the seconds_behind_master value by adjust system clock of master and slave to be equal.
For Linux system, adjust time by ntpdate command.
#ntpdate pool.ntp.org
14 Jul 09:03:53 ntpdate[28609]: step time server 176.31.45.67 offset 2.289779 sec
After updating system time in both master and slave machine, the value of Seconds_Behind_Master should be zero after slave done all SQL statement.
Monday, June 10, 2013
Icefaces 3.x : Handling session expired page redirection using jsf.ajax
Standard JSF solution for redirect session expired page.
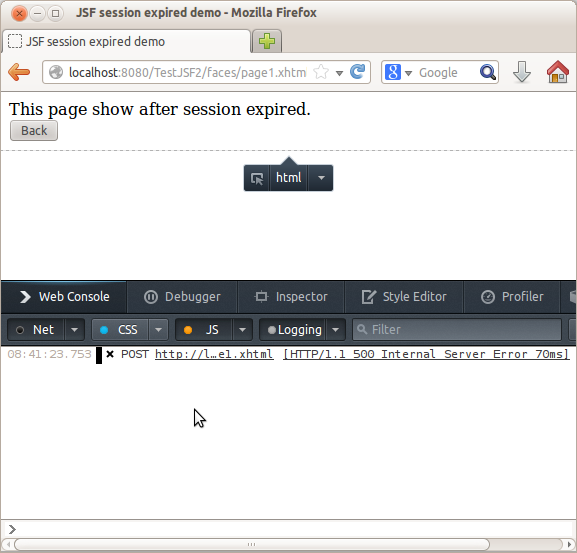
Without handling page redirection in case of session expiration in JSF standard implementation, you will get the Internal server error with javax.faces.application.ViewExpiredException thrown from JSF engine.

If you're working with standard implementation of JSF (no extended jsf component like myfaces or icefaces), the solution for redirecting page when session has expired is simply to define <error-page> tag in web.xml like this.
<error-page>
<exception-type>javax.faces.application.ViewExpiredException</exception-type>
<location>/faces/target.xhtml</location>
</error-page>
After applying error handling for ViewExpiredException, client still receive Internal Server Error but page redirection is completely loaded (Actually the page is forwarded instead of redirected).

But this method cannot be used to handle the same case in Icefaces 3.x!
Icefaces has its own mechanism for handling view states. Components shown in web browser are updated from server by controller called bridge which is javascript ajax that manage connection states.
When session expired is detected, popup message appear to show status.

Using jsf.ajax to handing session expired error and redirect to another page.
Standard JSF2.x implementation support Ajax by providing jsf.js as javascript resource. By adding the following tag with <head> tag of html document you can use several functions supported by ajax library.
<h:outputScript library="javax.faces" name="jsf.js"/>
Using Icefaces, you don't need to include above tag into your page source. It bundles this file automatically so you can write call back function jsf.ajax.addOnError that supported by jsf.js to receive exceptions from the bridge. Put the following javascript somewhere in body tag to detect SessionExpiredException.
<script type="text/javascript">
jsf.ajax.addOnError(function(data) {
if (data.responseText.indexOf("SessionExpiredException") > 0) {
window.location = "page2.jsf";
}
});
</script>
Whenever the bridge javascript caught SessionExpiredException, the added call back function will redirect to another page.

Although the redirection is completed, you still see a popup message just a second before redirection. To get rid of the popup message, you have to add the following context parameter to web.xml.
<context-param>
<param-name>org.icefaces.disableDefaultErrorPopups</param-name>
<param-value>true</param-value>
</context-param>
Without handling page redirection in case of session expiration in JSF standard implementation, you will get the Internal server error with javax.faces.application.ViewExpiredException thrown from JSF engine.

If you're working with standard implementation of JSF (no extended jsf component like myfaces or icefaces), the solution for redirecting page when session has expired is simply to define <error-page> tag in web.xml like this.
<error-page>
<exception-type>javax.faces.application.ViewExpiredException</exception-type>
<location>/faces/target.xhtml</location>
</error-page>
After applying error handling for ViewExpiredException, client still receive Internal Server Error but page redirection is completely loaded (Actually the page is forwarded instead of redirected).
Icefaces has its own mechanism for handling view states. Components shown in web browser are updated from server by controller called bridge which is javascript ajax that manage connection states.
When session expired is detected, popup message appear to show status.

Using jsf.ajax to handing session expired error and redirect to another page.
Standard JSF2.x implementation support Ajax by providing jsf.js as javascript resource. By adding the following tag with <head> tag of html document you can use several functions supported by ajax library.
<h:outputScript library="javax.faces" name="jsf.js"/>
Using Icefaces, you don't need to include above tag into your page source. It bundles this file automatically so you can write call back function jsf.ajax.addOnError that supported by jsf.js to receive exceptions from the bridge. Put the following javascript somewhere in body tag to detect SessionExpiredException.
<script type="text/javascript">
jsf.ajax.addOnError(function(data) {
if (data.responseText.indexOf("SessionExpiredException") > 0) {
window.location = "page2.jsf";
}
});
</script>
Whenever the bridge javascript caught SessionExpiredException, the added call back function will redirect to another page.

Although the redirection is completed, you still see a popup message just a second before redirection. To get rid of the popup message, you have to add the following context parameter to web.xml.
<context-param>
<param-name>org.icefaces.disableDefaultErrorPopups</param-name>
<param-value>true</param-value>
</context-param>
Saturday, June 8, 2013
Installing Virtual Box's Guest Additions for Cent OS 6.4
Why Guest Additions installation failed?
Virtual Box's Guest Additions for Linux based guest OS need to compile kernel modules while it is installing additional components. Your Linux need compilation tools and kernel development libraries so that installer can use them to compile kernel modules.

Packages required for installing Virtual Box's Guest Additions
Before install Virtual Box's Guest Additions, You should install compilation and kernel development tools using root account.
Then mount VBOXADDITIONS image by selecting from Virtual Box's menu.
Installation
After VBOXADDITIONS image has been mounted, In terminal window, go to mounted point and run installation script.
Installation should pass without [FAIL] status. Shutdown Linux and start up again.
After Linux has been started, you can do the following features come from the guest additions.
And by enabling some features in Virtual Box's devices menu, you can do the following tasks.
Virtual Box's Guest Additions for Linux based guest OS need to compile kernel modules while it is installing additional components. Your Linux need compilation tools and kernel development libraries so that installer can use them to compile kernel modules.

Packages required for installing Virtual Box's Guest Additions
Before install Virtual Box's Guest Additions, You should install compilation and kernel development tools using root account.
#yum install gcc automake libtool kernel-devel
Then mount VBOXADDITIONS image by selecting from Virtual Box's menu.
Devices -> Install Guest Additions..
Installation
After VBOXADDITIONS image has been mounted, In terminal window, go to mounted point and run installation script.
#cd /media/VBOXADDITIONS_4.X.X
#./VBoxLinuxAdditions.run
Installation should pass without [FAIL] status. Shutdown Linux and start up again.
After Linux has been started, you can do the following features come from the guest additions.
- Move the mouse into or off the guest screen seamlessly.
- Working with guest OS in full screen mode.
And by enabling some features in Virtual Box's devices menu, you can do the following tasks.
- Drag files or folders from host OS into guest OS desktop screen.
- Copy some text from application which run on host OS and then paste it into application which run on guest OS.
Subscribe to:
Posts (Atom)